6.2 Editing and Formatting Content
Jul 29, 2015 4948 Print this page Download PDF Request support
Editing Content
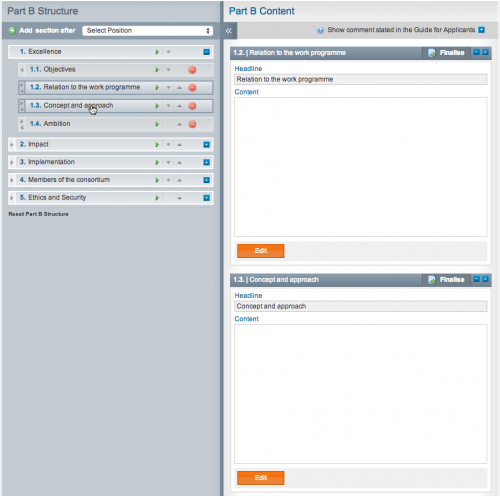
To start editing one or more content elements, click on the headline(s) in the navigation pane on the left hand side. The content editor window will appear on the right in read mode.

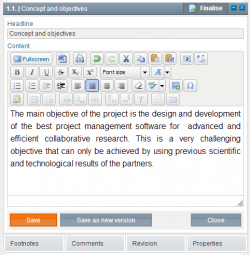
To edit a section, click the button ![]() underneath the editor box.
underneath the editor box.

Next, place your cursor in the editor box and click to start writing or editing.
Saving Content
To save the current content and overwrite the last saved version, click the ![]() underneath the editor.
underneath the editor.
To save the current content as a new version, click the ![]() button.
button.
Note that users with Contractor Rights can only save their changes only as a new version, unless they were the user who edited the last version.
Insert Images and Figures – Media Manager
It’s not possible to paste images directly into the editor. First you need to convert your images to .jpg, .gif or .png files and upload them to the media manager.
To add one or more images to the Media Manager enter a content element and click on “Edit”. Once in edit mode click on the image icon ![]() in the editor. You can then upload one or more images to the online media library. After the images have been added to the Media Manager you can insert them into a content element. To do this, open the content element you wish to add an image to > put your cursor where you’d like the image to be inserted > Click on the Media Manager button in the editor toolbar > select the image you’d like to use from the Media Manager > Use image. You can add a caption to the image by hovering over the top of the image to activate the caption field.
in the editor. You can then upload one or more images to the online media library. After the images have been added to the Media Manager you can insert them into a content element. To do this, open the content element you wish to add an image to > put your cursor where you’d like the image to be inserted > Click on the Media Manager button in the editor toolbar > select the image you’d like to use from the Media Manager > Use image. You can add a caption to the image by hovering over the top of the image to activate the caption field.
You can delete images in Media Manager by first opening the Media Manager as described above, selecting the image and clicking on the “Delete Image” button.
Finalize (Lock Content)
When all of the necessary changes have been made to a content element you can click the Finalize button. Once a user clicks the Finalize ![]() button the section is locked and can only be unfinalized by users with Coordinator Rights. Users with Coordinator Rights can unlock finalized information, by selecting the locked content element and clicking on Unfinalize
button the section is locked and can only be unfinalized by users with Coordinator Rights. Users with Coordinator Rights can unlock finalized information, by selecting the locked content element and clicking on Unfinalize ![]() .
.
Related Articles
-
Managing Revision of Content Elements
April, 13 2012 2
-
6.4 Inserting and Editing Comments
April, 10 2012 4
-
6.3 Inserting and Editing Footnotes
April, 7 2012 4
-
Editing Part B Content and Structure
April, 2 2012 3
